CDNs for Small Websites

Content Delivery Networks (CDN) are typically most useful for sites with a widely dispersed audience, or those with high traffic. They serve static files from locations close to the user for faster response times and alleviate load from the main server. However a CDN can make small websites at the other end of the spectrum a lot faster too!

CDNs for small websites

I recently built a simple one-page website for a client. It’s a minimal online presence to capture searches for their business name, provide some information and a contact form.

In theory even entry-level shared hosting should load a site like this very quickly. In practice it can be like a ballpoint pen – if it hasn’t been used for a while it’s slow to put ink on the page. Once it gets going it’s fine.

Low-traffic small business sites can effectively be ‘put the site at the back of the server’, like the ink that’s dried on the tip of a pen. If the site hasn’t been requested for several hours that first response can be a lot slower than it should be. Subsequent hits might be perfectly quick, but that doesn’t help with the first impression.

I was able to speed up this site considerably by using the traditional cPanel shared host as a CDN Origin, and route the domain through Cloudfront. Cloudfront acts as a fast cache, storing a rendered version of the page (and its supporting files) to respond quickly to sporadic visits.

This retains the flexibility of some basic server side rendering while massively speeding that first page load. The backend functionality required to run the contact form works via an Ajax request to the underlying cPanel server.

For simple sites this approach was a lot easier to develop (read cheaper) than a full static site generation approach, while still giving some scripting capabilities and the speed of a static site deployed to a CDN.

Using AWS Cloudfront with a Custom Domain and Free SSL

AWS Cloudfront is a CDN for delivering content to your users faster, by serving it from locations closer to them. It caches requests nearer to users and call pull the original content from its S3 service, or your own web server.

By default a Cloudfront distribution comes with an SSL enabled subdomain on the cloudfront.net domain name that looks something like this:


dlksg932809.cloudfront.net //default example
cdn.mikehealy.com.au //custom domain

You can also create a free SSL certificate through AWS for your own custom domain (or subdomain) and point that to your Cloudfront distribution. This is especially useful if you’re using Cloudfront to serve a static site in lieu of a conventional server.

Creating a Free, Custom SSL through AWS Certificate Manager

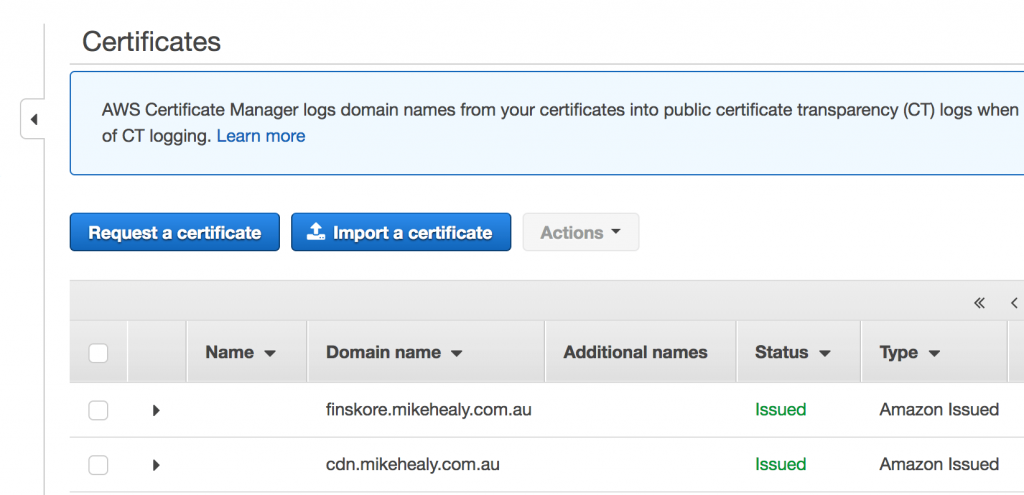
Go to AWS’ Certificate Manager product and choose ‘Request a certificate’.

You’ll be asked to specify your domain (or subdomain) and which validation method to use.

DNS Validation

This method has you setting a CNAME record for the domain to prove that you have control of the domain. It’s the preferred method, however some DNS providers don’t support the characters required due to faulty validation rules, and so it might not be available to you.

Email Validation

This is the alternative method and requires you to have access to receive mail at a common admin email address such as administrator@example.com for your root domain.

The process after either creating your DNS CNAME or selecting email validation is essentially to follow the prompts and let AWS provision a new certificate for you.

Setting up your Cloudfront Distribution

Once your certificate has been created you can create your new distribution and select it as the SSL certificate to use. The other options for your distribution aren’t covered in this post, but you can now use your own (sub)domain to point to this distribution and your choice of S3 or your own web server to act as the origin server.

Provisioning the distribution takes a little while, usually more than 15 minutes in my experience.
Once that’s happened you’ll have a great, low cost static file serving distribution on your own domain with free SSL!

This is great for low-cost side projects or serving static files for your main website that would not otherwise justify setting up a web server and configuring Lets Encrypt, or having to purchase a traditional SSL certificate.

CDNs for WordPress

You can use a plugin (of course) to rewrite your content URLs so they are served off your CDN. This leaves the editing and publishing process unchanged. The plugin will handle converting local URLs to CDN versions.

As mentioned you have the choice of using your local web server, or S3 as the origin for your Cloudfront distribution. One advantage of moving your media off your WordPress site and onto S3 as the main store is that your local site install stays smaller and is therefore easier to move and backup.

Useful WordPress / S3 / CDN plugins

WordPress HTTP Error Uploading Larger Files

Sometimes WordPress shows a mysterious “HTTP Error” after attempting to upload a file. The file appears to upload with the progress sliders moving as normal, but fails at the end of the process without a descriptive error message.

There are a few possible causes of this, but if you have an Nginx server and small uploads are working while larger ones fail the problem might be Nginx’s max body size setting.

Increase Nginx’s client_max_body setting

Go to your Nginx sites-enabled directory (/etc/nginx/sites-enabled on Ubuntu systems) and update your server settings like so:

server {
   # other stuff is here too

   client_max_body_size 20M;
}

Restart Nginx.

Laravel Eloquent gotcha using With and Find

The Eloquent ORM in Laravel makes it easy to pull in related models using the ::with() method.  It’s very useful and can solve the N+1 Query problem that can occur when accessing related models in a loop from the parents records.

<?php
$data = MyParentModel->with('ChildModel');

You’d commonly want to use this when accessing a particular parent model using the ::find() or ::findOrFail() method. The trap can be that with() must be called before findOrFail().

If you chain methods and call findOrFail() first it will be ignored and your result set will include all parent rows!

<?php
$data = MyParentModel->with('ChildModel')->findOrFail($parent_id);

Gravity Form Checkbox Values

This post is an extension of Gravity Forms – Collecting Select Box Value.
In this demo we are capturing the values from a group of checkboxes.

Demo with Checkboxes

    Select the items to add to your order
  • ...we'll grab the checkbox values here

/**
* Wrap our JS for capturing values
*/
var checkboxHandler = {
 
 	//Change these IDs to match your form
 	checkboxFieldId: 'input_5_3',  //checkbox container ID
	outputFieldId:   'input_5_2',    //hidden field to capture values
	
	checkboxField: null,
	outputField: null,
	
    /*
	Listen to Checkboxes
	---------------------- */
    init: function() {
    
		this.outputField = document.getElementById(this.outputFieldId);
		
		if( typeof this.outputField === 'undefined' || !this.outputField ) {
			console.error('Missing output field ' + this.outputFieldId);
			return;
		}
		
        this.checkboxField = document.getElementById(this.checkboxFieldId);
        if(typeof this.checkboxField === 'undefined' || !this.checkboxField) {
			console.error('Missing checkbox field ' + this.checkboxFieldId);
            return;
        }
         
        jQuery(this.checkboxField).on(
			'change',
			'input[type=checkbox]',
			{
				checkbox: this.checkboxField,
				output:   this.outputField
			},
			this.setValues
		);
    },
    
	
    /*
	Set text (or hidden) field to list of checkbox values
    ----------------------------------- */
    setValues: function(ev) {
	
		var fields = ev.data;
        var valueString = '';
		
		jQuery(fields.checkbox).find('input:checked').each( function(i){
			valueString += this.value + ', ';
		});
		
		fields.output.value = valueString.replace(/, $/, '');
    }
};

jQuery().ready( checkboxHandler.init() );

If you are using a child theme or custom theme you can add this code to its JavaScript file.
Otherwise use WordPress’ wp_register_script and wp_enqueue_script functions to load a new file.
The value of the hidden/text box can then be included in your Gravity Forms notification.

Gravity Forms – Collecting Select Box Value

Gravity Forms for WordPress has a select box field type, which by default uses the same data for both value and label. The field can easily be configured to have separate value and label attributes, however only the label will be sent in the form notification. In many cases this is fine, but sometimes you need the <option> value data to be sent as well as the display label.

Alternative Option: Capturing Checkbox Values

Capture the Value Attribute in a Hidden Field

One solution is to use JavaScript to capture the <select> field’s value, and copy it to a hidden form field which can be included in the email notification.

We’ll use a bit of custom JavaScript to listen to the <select> change event and update our hidden form field. This example code uses specific field ids that Gravity Forms generates. You could also write more general JS and selectors to match more scenarios if your site has multiple forms.

The Form Setup

At minimum we’ll need a select input (drop down) and a hidden field. For this demo our hidden field is actually plain text so we can see what’s happening.

Demo Product Form

  • Choose a product...
  • ...we'll grab the select option value here

Here’s the JavaScript. This example matches the IDs in the demo form. You’ll need to change those selectors to suit your form.

/**
* Wrap our JS for capturing values
*/
var selectHandler = {

	// Setup & Event listener
	// ----------------------
	init: function() {
		
		var select = jQuery('#input_3_1')[0]; //change id to match your form
		if(typeof select === 'undefined' || !select) {
			return;
		}
		
		//Set Initial Value (before change)
		selectHandler.setEmail.apply( {value: select.value} );
		
		jQuery(select).on('change', this.setEmail);
	},
	
	// Set text (or hidden) field to option value
	// (change selector to match your form)
	// ------------------------------------
	setEmail: function(ev) {
		 jQuery('#input_3_2')[0].value = this.value;
	}
};
jQuery().ready( selectHandler.init() );

If you are using a child theme or custom theme you can add this code to its JavaScript file.
Otherwise use WordPress’ wp_register_script and wp_enqueue_script functions to load a new file.
The value of the hidden/text box can then be included in your Gravity Forms notification.

WordPress Debugging

Bronson Quick spoke at the WordCamp Sunshine Coast today on debugging for WordPress. He covered techniques for fixing a white-screen of death as well as getting detailed information to sort out squirrelly bugs and performance issues.

Firstly WordPress has a few rad constants you can switch on to get better information about where things are breaking.

define( 'WP_DEBUG', true );     //I was blind, now I can see (my PHP errors)
define( 'WP_DEBUG_LOG', true ); //for production, write logs to wp-content
define( 'SCRIPT_DEBUG', true ); //use non-minified versions of core CSS/JS
define( 'SAVEQUERIES', true );  //log queries, look for suspicious ones. Not for production

Local Development

Develop in an environment close to the production hosting environment your site will be deployed to. The best way to do this is with virtual machines and tools like Vagrant.

Chassis is a WordPress focused VM for Vagrant. It’s configured with Nginx, MySQL, PHP 5.4 – 5.6 and has a bunch of handy extensions available to set up things like Xdebug, Debug Bar and Query Monitor quickly. The disposable nature of VMs means you can create one for each project.

Creating a Chassis VM

git clone git@github.com:Chassis/Chassis.git myproject
cd myproject
vagrant up

Chassis Extensions

Debug Bar gives you a lot of insight into what WordPress is doing to generate a page.

cd myproject/extensions
git clone https://github.com/Chassis/Debugging.git
vagrant provision

This will install a collection of Debug Bar plugins into WordPress en mass. What a time saver.

Query Monitor is an alternative tool for monitoring database activity in WordPress. It does more than monitoring SQL and can even show script dependencies, en queued styles and highlight errors.

So…

  • Develop in an environment similar to where you’ll deploy. Let Chassis set that up for you.
  • Use Xdebug, Debug Bar and Query Monitor as necessary to get insight into what your code is doing

WordPress Backups to AWS S3

Amazon Web Services S3 (Simple Storage Service) is a cheap and reliable way of storing data and is ideal for backups. Scheduling regular automatic backups of your WordPress website to S3 is pretty easy with a plugin, but it can be worth tweaking your AWS Credentials for better security.

This post will show you how to create a new user on your AWS account that has limited S3 permissions. It means if your site is ever compromised and the credentials stolen you’ll be in a far better position than having used your root AWS details! It’s also especially useful if you are managing backups of multiple client sites and do not want cross-access.

Step 1 – Create a new user with IAM in the AWS Console

  • Log into the AWS Console. Go to Services > Security & Identity > IAM
  • Create a new user (e.g. backup_myexample)
  • Copy and paste the Access Key and Secret somewhere; we’ll use those within WordPress shortly.

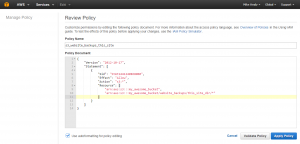
After creating your new user, go to their Policies and create a new inline policy. We’ll use inline, rather than group permissions so that each user you create (for backing up different websites) is isolated to their own S3 path.

Give the policy a name and paste and modify this Policy Document. Change my_awesome_bucket and my_directory to the bucket and path you’re using for these backups.

{
  "Version": "2012-10-17",
  "Statement": [
  {
  "Sid": "Stmt1441240868000",
  "Effect": "Allow",
  "Action": "s3:*",
  "Resource": [
  "arn:aws:s3:::my_awesome_bucket",
  "arn:aws:s3:::my_awesome_bucket/website_backups/my_directory/*"
  ]
  }
  ]
}

Your screen should look a bit like this
AWS IAM Policy

Step 2 – Install & Configure BackWPUp

  • Log into your WP Dashboard, go to Plugins > Add New Plugin and search for BackWPUp
  • Install it and create a new job. For testing you may want to do Database backup only, or list of plugins. This is much faster that a full site (Files) backup. Once you know it’s working setup a full site backup.
  • Set the backup to S3 Service.
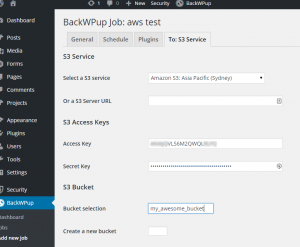
  • On the S3 Service page select your Region and paste in the Access Key and Secret key from before.
  • Type in your bucket name and path to store the backups. It should match the IAM Policy Document

s3-plugin-cfg

Save your settings and run the job.

The plugin logs will let you know if it worked.

A few notes

  • The IAM Policy allows all S3 actions on the given S3 path. I was not able to get this plugin to work with more restrictive permissions.
  • The new S3 Standard-IA class is good for these backups. The storage cost is cheaper than the Standard class without sacrificing redundancy as with Reduced Redundancy Storage. The downside is that downloads of these objects are more expensive.
  • Remember to check your backups periodically

wkhtmltopdf 0.12 on Ubuntu 14.04

The Problem

wkhtmltopdf is a library for rendering PDFs from HTML or live web pages.

  • apt-get install wkhtmltopdf  will install the older 0.9 version, which isn’t compatible with the Snappy PHP wrapper
  • wkhtmltopdf 0.9 is also unable to render on ‘headless’ operating systems and needs another package to simulate a display. The newer 0.12 version doesn’t have this problem.

The Solution

Manually Install the ‘Static’ Binary from wkhtmltopdf.org

(NB: If you’re not a root or super user most commands will need to be sudo…)

Download the Ubuntu “Trusty” build.
At the time of writing this is wkhtmltox-0.12.2.1_linux-trusty-amd64.deb

wget http://downloads.sourceforge.net/project/wkhtmltopdf/0.12.2.1/wkhtmltox-0.12.2.1_linux-trusty-amd64.deb

Rename it something easy to type like wkhtml.deb

Extract it with this command

ar x wkhtml.deb
# if ar not installed run this:
# apt-get install binutils

Extract the binary

tar xf data.tar.xz

Move the binary file to /usr/bin

mv wkhtmltopdf /usr/bin/wkhtmltopdf

Now PDF Rendering Should Work

wkhtmltopdf http://example.com myTest.pdf

Laravel 5 Environment Config

Laravel 4 used a function that checked the servers hostname to determine the environment. Laravel 5 simplifies environment detection by having a .env file present in your project root.

.env.example is ignored by Laravel’s detection. You can fill it with the keys your application expects to act an an example for your own file.

.env is for the current environment

Add .env to your .gitignore file. It’s got to stay out of your repo so you don’t overwrite it each time you pull.
Copy/Rename .env.example to .env for each environment.

set the APP_ENV value within your .env file to tell Laravel where it’s running.

APP_ENV=local
APP_DEBUG=true
APP_KEY=123abc...
$app->environment(); //get the current environment
if($app->environment('local', 'staging')) { }  //test if local or staging env

You can retrieve your .env config values with the env() function.


$cfgValue = env('MY_SWEETAS_VARIABLE');