Using S3 Lifecycle rules with Spatie Laravel Backups

AWS S3 has a feature called Lifestyle Rules that let you define rules to run a range of transitions on your objects, such as changing their storage class or expiring (deleting) them.

This can be useful to save costs and clean up your object list by removing objects you don’t need to keep forever. You can lean on AWS for the expiry logic without having to program scheduled events to clean up for you.

Lifecyle rules can be targeted to an entire bucket, to objects with a path prefix, or to objects with a particular Tags.

Spatie Laravel Backup is a popular Laravel package for taking site/database backups.

It can be configured to write to various ‘disks’. If you’re using the S3 disk it is possible to Tag those backups for targeting by the Lifecycle rule.

Creating the rules in S3 and targeting a tag

S3 Console screenshot showing Management lifecycle rules

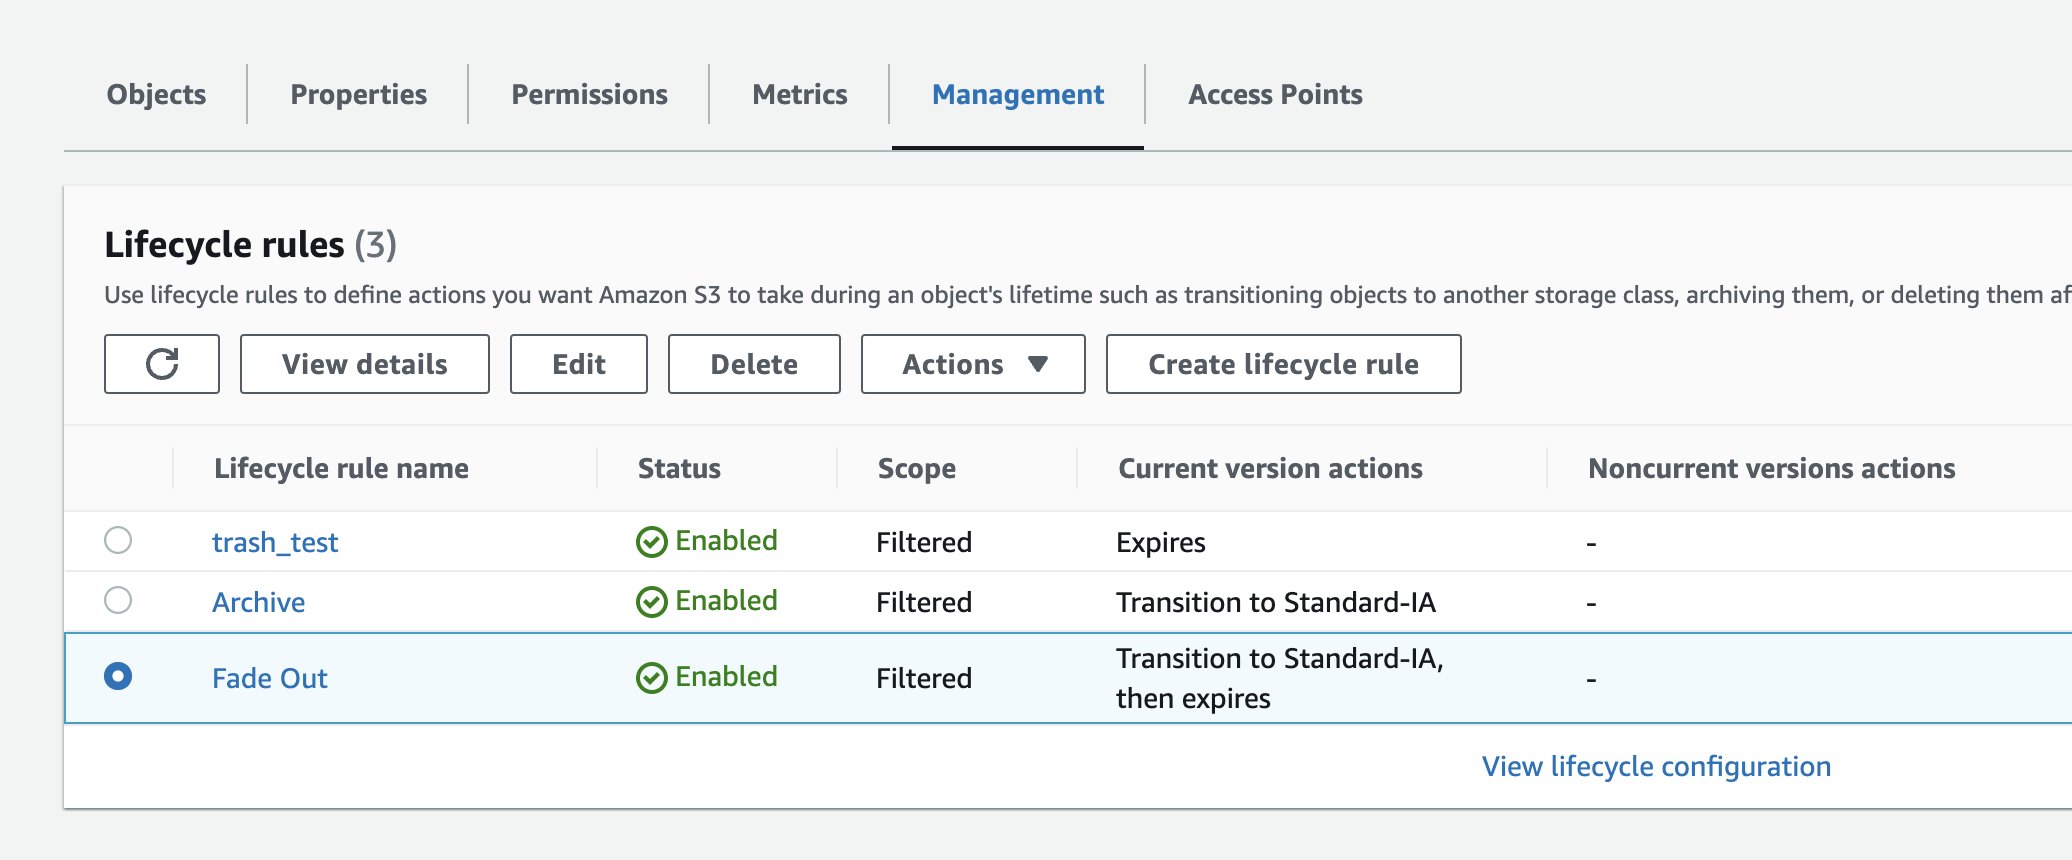
In my case I will be targeting a tag called fadeout with a value of true.

This rule will transition objects to the Standard Infrequent Access storage class after 30 days, and then delete them after 60 days. It also only applies to objects over 150kB.

Tagging backups that Laravel Backup uploads

To have your backup objects tagged in order for the lifecycle rule to take effect you’ll need to an an option to your Laravel fileysystems.php config file.

Assuming you are using the s3 disk, you’ll need to add a backup_options value to your S3 config array like so:

's3' => [
  'driver' => 's3',
  'key' => env('AWS_ACCESS_KEY_ID'),
  'secret' => env('AWS_SECRET_ACCESS_KEY'),
  'region' => env('AWS_DEFAULT_REGION'),
  'bucket' => env('AWS_BUCKET'),
  'url' => env('AWS_URL'),
  'backup_options' =>
     ['Tagging' => 'fadeout=true', 'visibility'=>'private'],
],

Backups are private by default, but because we’re overriding the options array we need to specify it again.
The format of the Tagging key is url encoded as shown.
The Tagging and visibility keys are case sensitive as shown.

With that in place you can keep your recent backups without cluttering your bucket 🙂

Using AWS Cloudfront with a Custom Domain and Free SSL

AWS Cloudfront is a CDN for delivering content to your users faster, by serving it from locations closer to them. It caches requests nearer to users and call pull the original content from its S3 service, or your own web server.

By default a Cloudfront distribution comes with an SSL enabled subdomain on the cloudfront.net domain name that looks something like this:


dlksg932809.cloudfront.net //default example
cdn.mikehealy.com.au //custom domain

You can also create a free SSL certificate through AWS for your own custom domain (or subdomain) and point that to your Cloudfront distribution. This is especially useful if you’re using Cloudfront to serve a static site in lieu of a conventional server.

Creating a Free, Custom SSL through AWS Certificate Manager

Go to AWS’ Certificate Manager product and choose ‘Request a certificate’.

You’ll be asked to specify your domain (or subdomain) and which validation method to use.

DNS Validation

This method has you setting a CNAME record for the domain to prove that you have control of the domain. It’s the preferred method, however some DNS providers don’t support the characters required due to faulty validation rules, and so it might not be available to you.

Email Validation

This is the alternative method and requires you to have access to receive mail at a common admin email address such as administrator@example.com for your root domain.

The process after either creating your DNS CNAME or selecting email validation is essentially to follow the prompts and let AWS provision a new certificate for you.

Setting up your Cloudfront Distribution

Once your certificate has been created you can create your new distribution and select it as the SSL certificate to use. The other options for your distribution aren’t covered in this post, but you can now use your own (sub)domain to point to this distribution and your choice of S3 or your own web server to act as the origin server.

Provisioning the distribution takes a little while, usually more than 15 minutes in my experience.
Once that’s happened you’ll have a great, low cost static file serving distribution on your own domain with free SSL!

This is great for low-cost side projects or serving static files for your main website that would not otherwise justify setting up a web server and configuring Lets Encrypt, or having to purchase a traditional SSL certificate.

CDNs for WordPress

You can use a plugin (of course) to rewrite your content URLs so they are served off your CDN. This leaves the editing and publishing process unchanged. The plugin will handle converting local URLs to CDN versions.

As mentioned you have the choice of using your local web server, or S3 as the origin for your Cloudfront distribution. One advantage of moving your media off your WordPress site and onto S3 as the main store is that your local site install stays smaller and is therefore easier to move and backup.

Useful WordPress / S3 / CDN plugins

WordPress Backups to AWS S3

Amazon Web Services S3 (Simple Storage Service) is a cheap and reliable way of storing data and is ideal for backups. Scheduling regular automatic backups of your WordPress website to S3 is pretty easy with a plugin, but it can be worth tweaking your AWS Credentials for better security.

This post will show you how to create a new user on your AWS account that has limited S3 permissions. It means if your site is ever compromised and the credentials stolen you’ll be in a far better position than having used your root AWS details! It’s also especially useful if you are managing backups of multiple client sites and do not want cross-access.

Step 1 – Create a new user with IAM in the AWS Console

  • Log into the AWS Console. Go to Services > Security & Identity > IAM
  • Create a new user (e.g. backup_myexample)
  • Copy and paste the Access Key and Secret somewhere; we’ll use those within WordPress shortly.

After creating your new user, go to their Policies and create a new inline policy. We’ll use inline, rather than group permissions so that each user you create (for backing up different websites) is isolated to their own S3 path.

Give the policy a name and paste and modify this Policy Document. Change my_awesome_bucket and my_directory to the bucket and path you’re using for these backups.

{
  "Version": "2012-10-17",
  "Statement": [
  {
  "Sid": "Stmt1441240868000",
  "Effect": "Allow",
  "Action": "s3:*",
  "Resource": [
  "arn:aws:s3:::my_awesome_bucket",
  "arn:aws:s3:::my_awesome_bucket/website_backups/my_directory/*"
  ]
  }
  ]
}

Your screen should look a bit like this
AWS IAM Policy

Step 2 – Install & Configure BackWPUp

  • Log into your WP Dashboard, go to Plugins > Add New Plugin and search for BackWPUp
  • Install it and create a new job. For testing you may want to do Database backup only, or list of plugins. This is much faster that a full site (Files) backup. Once you know it’s working setup a full site backup.
  • Set the backup to S3 Service.
  • On the S3 Service page select your Region and paste in the Access Key and Secret key from before.
  • Type in your bucket name and path to store the backups. It should match the IAM Policy Document

s3-plugin-cfg

Save your settings and run the job.

The plugin logs will let you know if it worked.

A few notes

  • The IAM Policy allows all S3 actions on the given S3 path. I was not able to get this plugin to work with more restrictive permissions.
  • The new S3 Standard-IA class is good for these backups. The storage cost is cheaper than the Standard class without sacrificing redundancy as with Reduced Redundancy Storage. The downside is that downloads of these objects are more expensive.
  • Remember to check your backups periodically